Excellent primary stability in soft bone
Featured Products Promotional FeaturesPosted by: Dental Design 8th December 2020
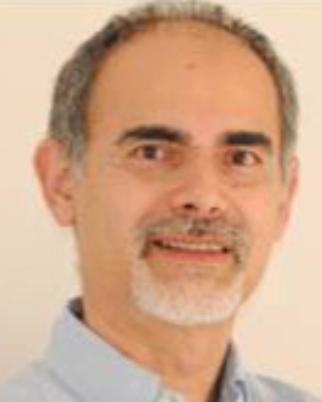
Dr Waseem Noordin describes how he restored a patient’s ability to eat and talk effectively with an implant-retained three-unit bridge.
An 85-year-old retired gentleman was referred to The Park Dental Practice for the restoration of his missing lower left and upper right premolar and first molar teeth (34, 35, 36 and 14, 15, 16) with dental implants.
The patient lost these teeth more than eight years previously and had been managing, reluctantly, with removable upper and lower acrylic dentures. His medical history was clear and he was fit and healthy.
The patient’s initial priority was to have the missing lower left posterior teeth restored, as he did not want to wear a lower denture any longer. We discussed the possibility of a removable lower cobalt-chromium denture, but he wished to have fixed teeth, so he could enjoy eating again.
Challenging diagnosis
A thorough clinical examination was undertaken. The presence of small bilateral lingual mandibular tori in the first premolar (34 and 44) region made the wearing and retention of the lower denture difficult.
Intra-orally, the remaining dentition was sound, with a healthy and stable periodontal condition. The lower left alveolar ridge had undergone resorption with loss of bone height and buccal width.
The OPG radiograph confirmed the absence of any pathology in both jaws [Figure 1]. A CBCT scan of the lower jaw was taken to accurately assess the anatomy and position of the inferior dental nerve [Figure 2]. The scan confirmed loss of buccal bone and shed some light on the compromised density of the trabecular bone, especially in the first and second premolar regions (34 & 35).
A diagnostic wax-up was prepared and a surgical stent constructed on the diagnostic set-up, to mark the position of the implants on the ridge during placement.
Angulated implant placement
Due to the patient’s compromised bone density, it was decided to stage the treatment and not immediately load. The implants were placed at slight angles, in the second premolar and first molar (35 & 36) sites, in order to engage dense bone and achieve good primary stability. Bone density in the first premolar region was inadequate for primary stability.
An Anthogyr Axiom® Multi Level® PX BL (Bone Level) (4 mm diameter and 10 mm length) implant was placed in the second premolar site and an Axiom® Multi Level® Reg BL (4 mm diameter and 10 mm length) implant was placed in the first molar site [Figure 3]. Following four months of undisturbed healing, inLink® Reg abutments with 2.5 mm gingival height were attached and tightened to 25 Ncm [Figures 4 and 5].
Axiom® Multi Level® is very user friendly. The implant surgical kit, and the steps involved during the surgery, are straightforward, resulting in minimum trauma to the bone and osteotomy site. The implants afford excellent primary stability, due to the thread design and osteotomy preparation, even in soft bone. The prosthetic kit is also easy to use and sterilise.
Prosthesis design
A three-unit screw-retained posterior cantilever porcelain bonded bridge on cobalt-chromium substructure was required, with inLink® attachments, to allow for a passive fit on the divergent implants. Open tray transfer impressions were taken and given to Ceramtech Dental Laboratory for planning and construction of the prosthesis.
The position of the implants was transferred into a digital model, using scan bodies. The bridge framework was designed on a reduced anatomical form using 3Shape Dental Designer [Figure 6: Design image from Ceramtech]. The design data was sent to Anthogyr’s Simeda® CAD/CAM team for production of the substructure. Turnaround was rapid and, after a few days, the substructure was delivered. The ceramic was applied using the laboratory locks supplied, which allow the framework to be fitted on the model and removed with ease. Once the ceramic application was completed, the definitive inLink® locks were fitted into the framework using the 2-in-1 wrench provided [Figure 7].
Easy prosthetic location
Two weeks after the impressions had been taken, the patient returned for the restoration. The healing screws were removed from the inLink® abutments with a hexagonal wrench. Image 8 was taken just prior to fitting the prosthesis, to illustrate how the access channel can be angulated up to 25 degrees from the implant axis. This enables appropriate positioning of the access screw hole for ease of securing the prosthesis in any region of the oral cavity, using the long ball wrench driver. The prosthesis was easy to locate on the abutments, due to the clinical guide lock in one of the crown abutments. The screws were tightened to 25 Ncm.
Using Axiom® Multi Level® for this case enabled the passive fit of the prosthesis and easy access intra-orally, for securing the screw-retained bridgework. In addition, the marginal fit of the bridgework on the inLink® abutments was excellent, thus allowing for easy oral hygiene and good plaque control.
The patient was very satisfied with the final result and was able to enjoy chewing food, especially vegetables and fruit, without taking too long to eat his meals. He was less conscious of the gap and that gave him confidence when talking to people [Figure 9]. He is now in the process of having his upper right posterior teeth restored.
Images:

Figure 1 – The OPG radiograph confirmed the absence of any pathology in both jaws

Figure 2 – A CBCT scan of the lower jaw was taken to accurately assess the anatomy and position of the inferior dental nerve

Figure 3 – An Anthogyr Axiom® Multi Level® PX BL (Bone Level) (4 mm diameter and 10 mm length) implant was placed in the second premolar site and an Axiom® Multi Level® Reg BL (4 mm diameter and 10 mm length) implant was placed in the first molar site

Figure 4 – Following four months of undisturbed healing inLink® Reg abutments with 2.5 mm gingival height were attached and tightened to 25 Ncm

Figure 5 – Following four months of undisturbed healing inLink® Reg abutments with 2.5 mm gingival height were attached and tightened to 25 Ncm

Figure 6 – The bridge framework was designed on a reduced anatomical form using 3Shape Dental Designer

Figure 7 – Once the ceramic was completed, the definitive inLink® locks were fitted into the framework

Figure 8 – The access channel can be angulated up to 25 degrees from the implant axis for ease of securing the prosthesis in any region of the oral cavity

Figure 9 – The patient was very satisfied with the final result and was able to enjoy chewing food, especially vegetables and fruit, without taking too long to eat his meals
Author:
Dr Waseem Noordin MSc ImpDent (Lond), BDS, DipImpDent RCS (Eng) (Adv cert), LDS RCS (Eng)
Dr Waseem Noordin is a faculty member of Practical Implant Dentistry Academy, with over 30 years of experience in all aspects of surgical and restorative implant dentistry. He regularly lectures and runs courses in this field. Waseem provides assistance to colleagues in planning cases and one-to-one mentoring in all aspects of implant treatment.
Dr Noordin is a Fellow of the International College of Dentists. He was a tutor, lecturer, cohort director and examiner of the FGDP Diploma in Implant Dentistry at the Royal College of Surgeons of England for ten years. He was a board member of the FGDP (UK) for nine years and director of the Central London Division.
The Park Dental Practice
166 Whitchurch Lane
Edgware
Middlesex HA8 6QL
Tel: 020 8905 6324
Email: theparkdentalpractice@gmail.com